FL101
Simple to Learn
Powerful to Scale
Design, deploy and execute BPMN 2.0 processes — all without writing a single line of code.
Simple, Transparent Pricing
-
Free
FREE FOREVER
No credit card required
Everything you need to get started and run real processes. Includes:
- 1 published workflow (deployment)
- 100 countable activities per month
- 100 stored data schema records
- 2 Mb local file storage
-
Starter
AUD 15.00/month
Perfect for small-scale use. Includes:
- 3 published workflows (deployments)
- 10,000 countable activities per month
- 1,000 stored data schema records
- 100 Mb local file storage
- 10 End Point aliases
-
Team
AUD 150.00/month
Built for growing teams. Includes:
- 25 published workflows (deployments)
- 100,000 countable activities per month
- 1,000 stored data schema records
- 500 Mb local file storage
- 10 End Point aliases

Let's build your first process
In just a few steps, you'll create a simple workflow that logs a cheerful "Hello World" message. It's the classic starting point — and it works like magic.
-
Step 1
Sign Up
Create your account with your name and email. We'll send you a temporary password so you can log in and get started.
You'll have access to the following pages:
- Dashboard: See your account stats and access key resources.
- Projects: Manage your projects, processes, and deployments. You'll also find your security key vault, data schemas, and initial states here.
- Activities: View the execution history of your processes — including errors.
- Profile: Update your name, password, subscription, and team settings.

-
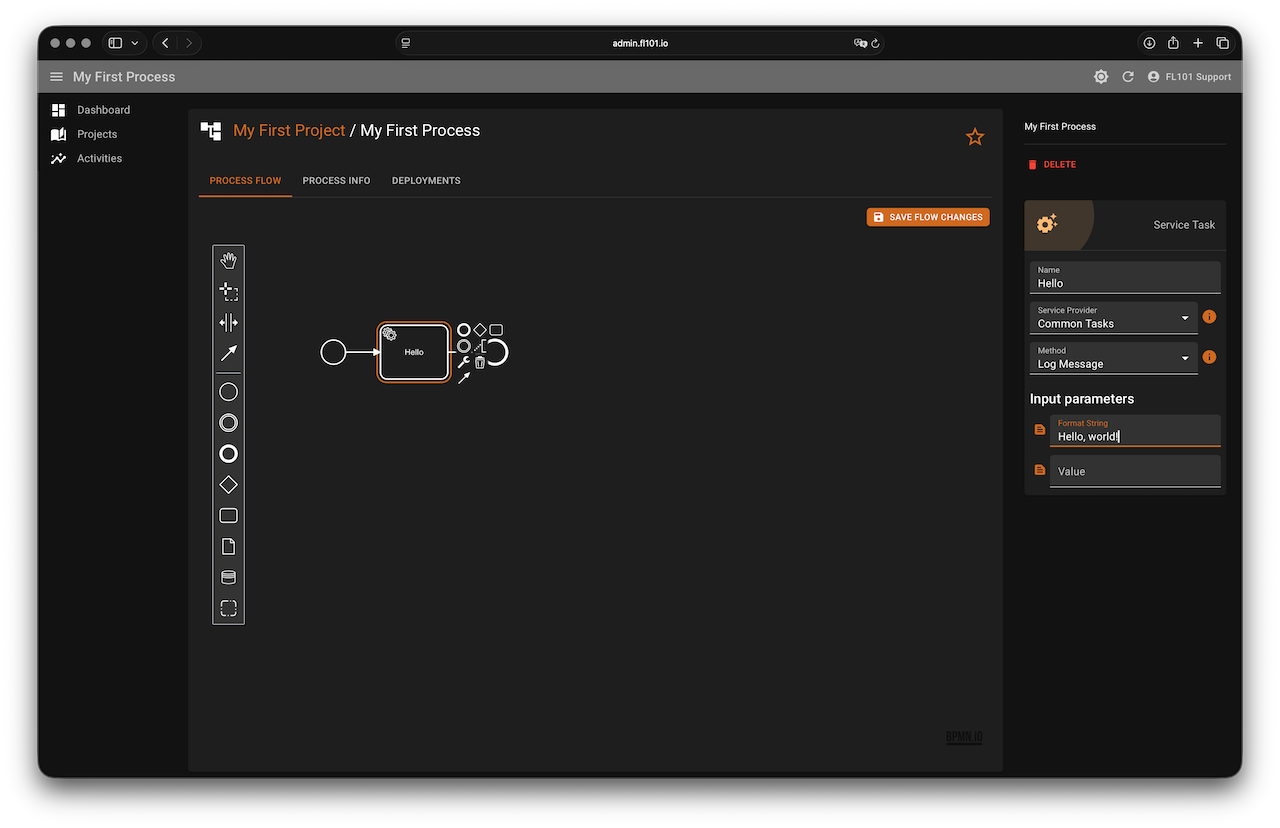
Step 2
First Flow Design
On the Projects page, create a new project, then add your first process. This takes you to the BPMN modeler where the fun begins.
Make a few simple changes to build your process:
- The start event is already in place — click it and append a task using the context menu.
- Next, select the task and append an end event.
- You now have a complete basic process: Start → Task → End.
- Change the task to a service task — click it, then select Change element and choose Service Task.

-
Step 3
No-Code Magic
The right panel now shows the service task’s properties. Give your task a name, select the Common Tasks provider, and choose the Log Message service.
Just a few final steps to make your process actually do something:
- The Log Message service requires two input parameters: Format String and Value.
- Set the format string to "Hello World!". The second parameter can be left empty for now.
- Don’t forget to click the Save Flow Changes button to apply your updates.
-
Step 4
Start your process
Before you can run your BPMN flow, it needs to be validated and prepared. That's what deployments are for — they turn your process into something executable.
Just three simple steps to launch it:
- Open the Deployments tab and click Create a new deployment.
- Give it a name — for example, hello v1.0 — and click Create.
- You’ll now see your new deployment. Click Start to launch your process into action.

-
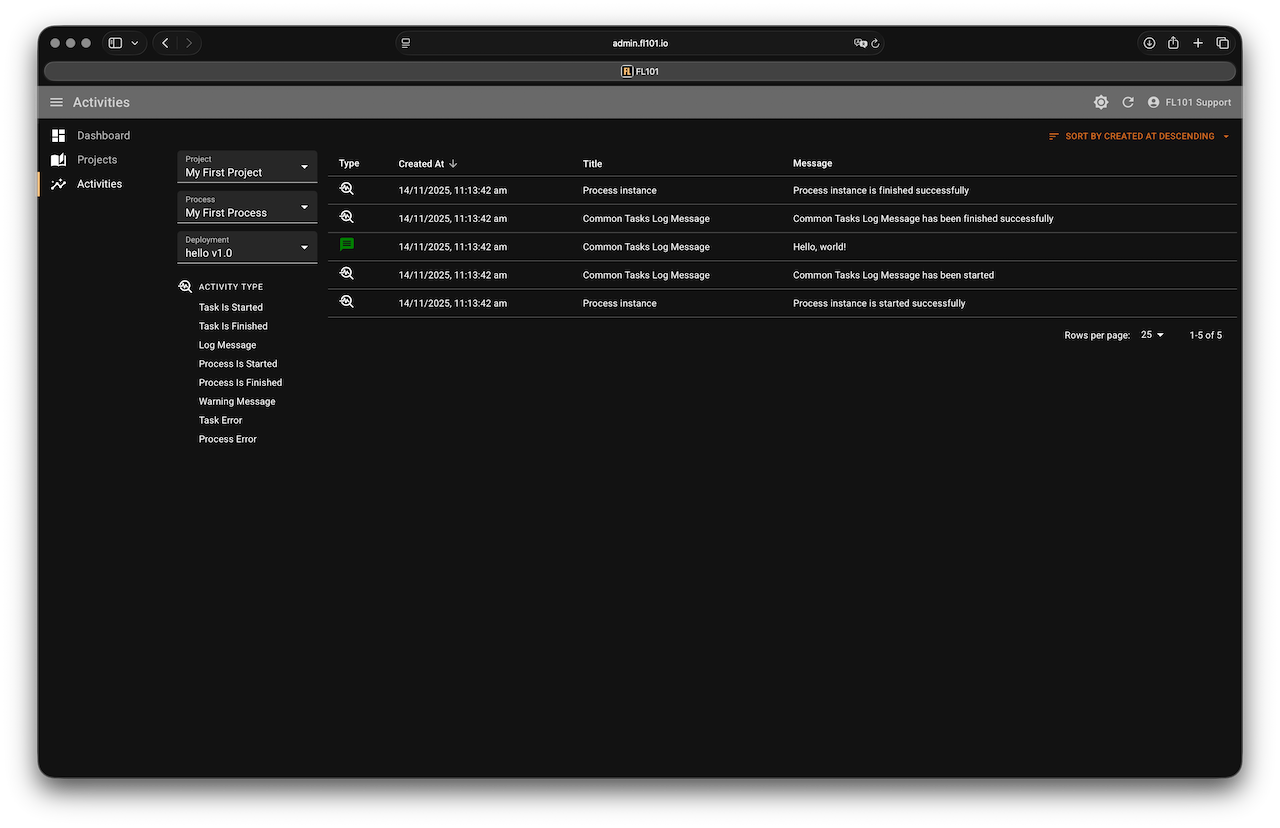
Step 5
Check results
Your “Hello World” process runs as a single, simple instance — but real workflows often involve many instances, triggered by events or split by parallel gateways. The Activities page helps you monitor all that complexity.
Here’s how you can monitor your process executions:
- On the Deployments tab, click the Activities button to view logs filtered for this specific deployment.
- The Activities page lets you filter by project, process, and deployment.
- Print your own custom messages to the activity log for easier debugging and visibility.
- The Dashboard page shows a bar chart of activity counts and errors per day, with monthly totals.