Weather Forecast

This use case demonstrates how to build an engaging, real-time web service using FL101. The process accepts a simple HTTP GET request with a location parameter and instantly returns a beautifully formatted HTML page containing:
- Today’s current weather conditions
- A 3-day forecast
- A short, AI-generated historical weather story for the same location and time of year
It’s a great example of combining external APIs (WeatherAPI.com + OpenAI), templates, error handling, and direct HTTP responses – all within a single visual workflow.
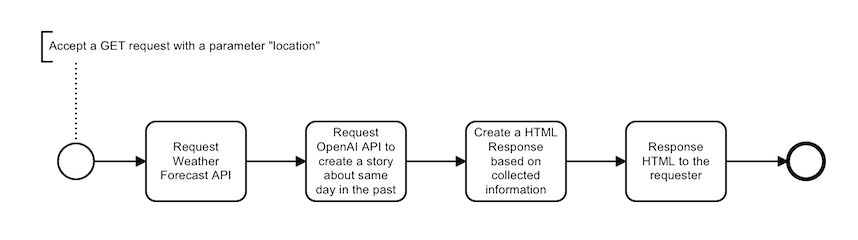
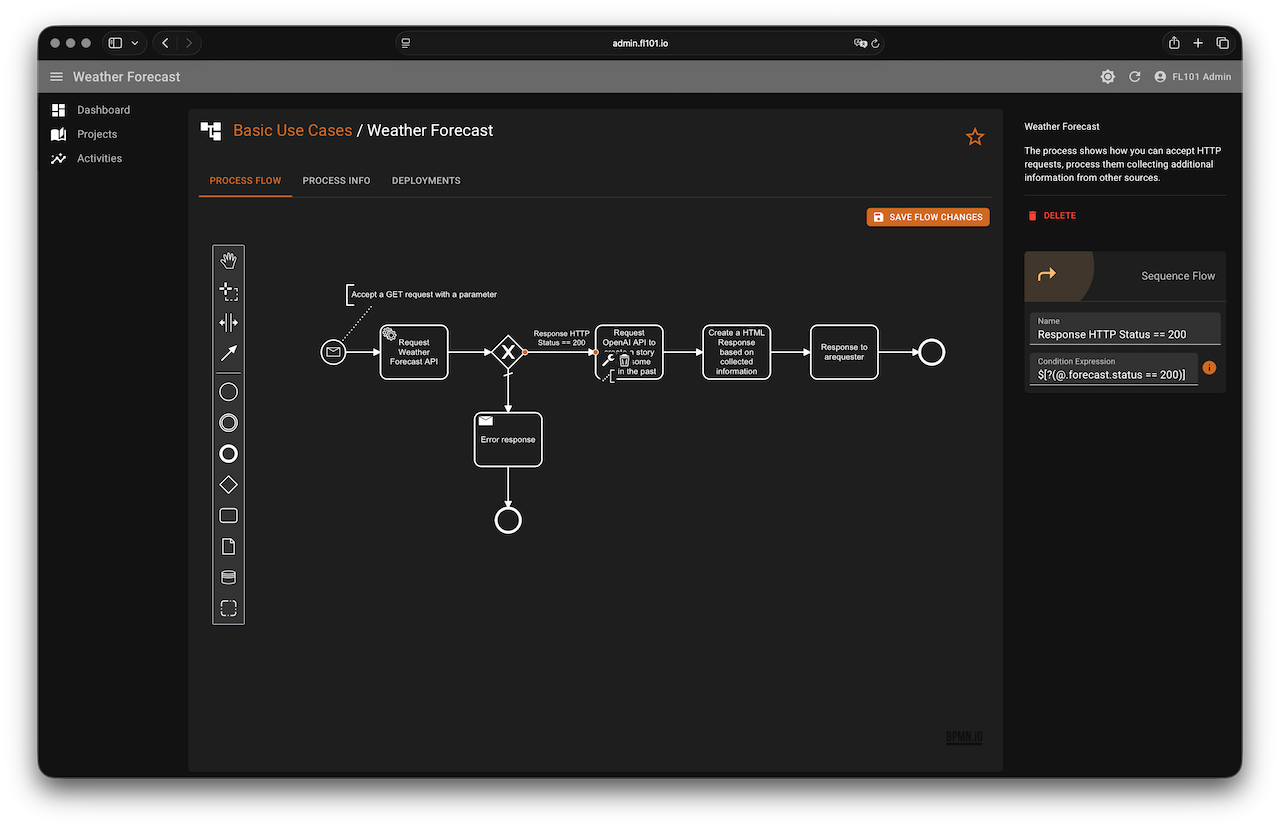
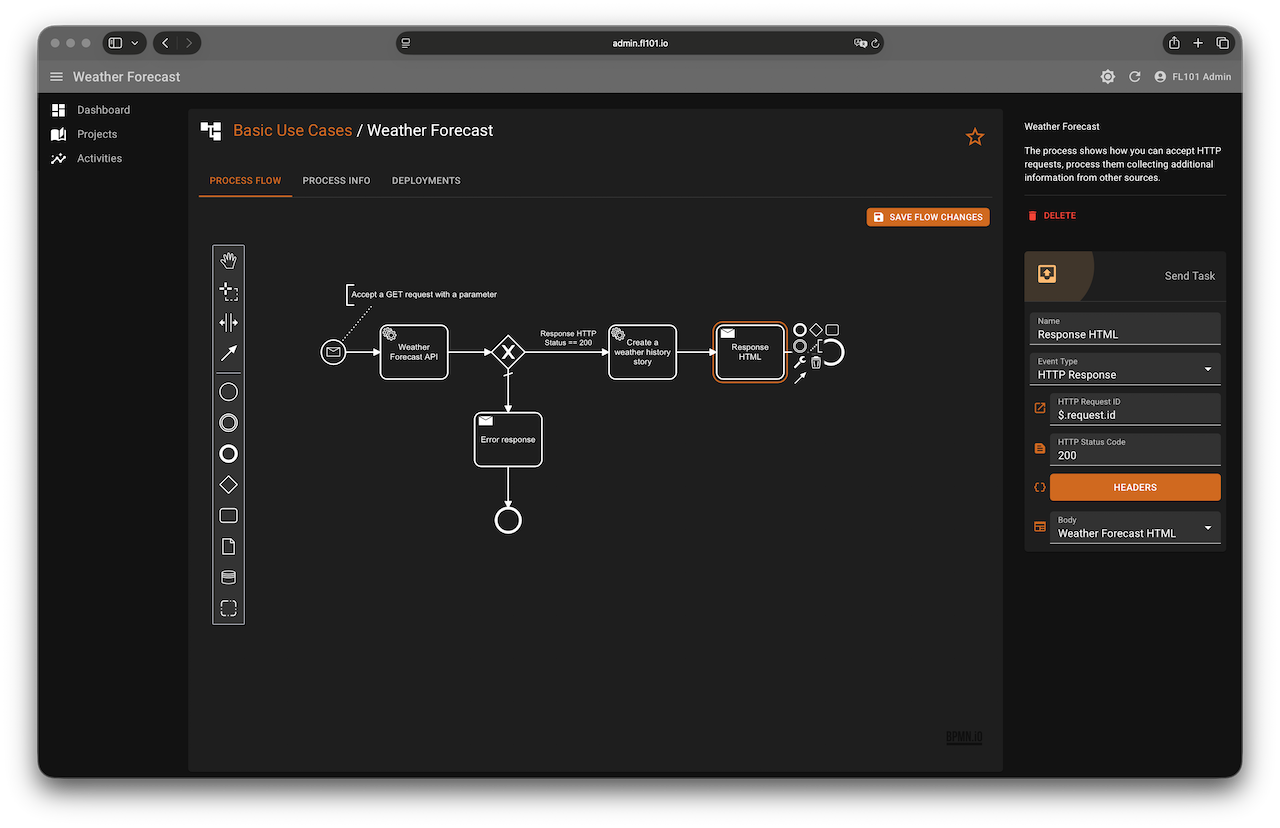
Overview of the Workflow
The process listens for incoming HTTP GET requests → calls the WeatherAPI → generates a historical weather story with OpenAI → builds a rich HTML response using a template → sends it back to the caller.
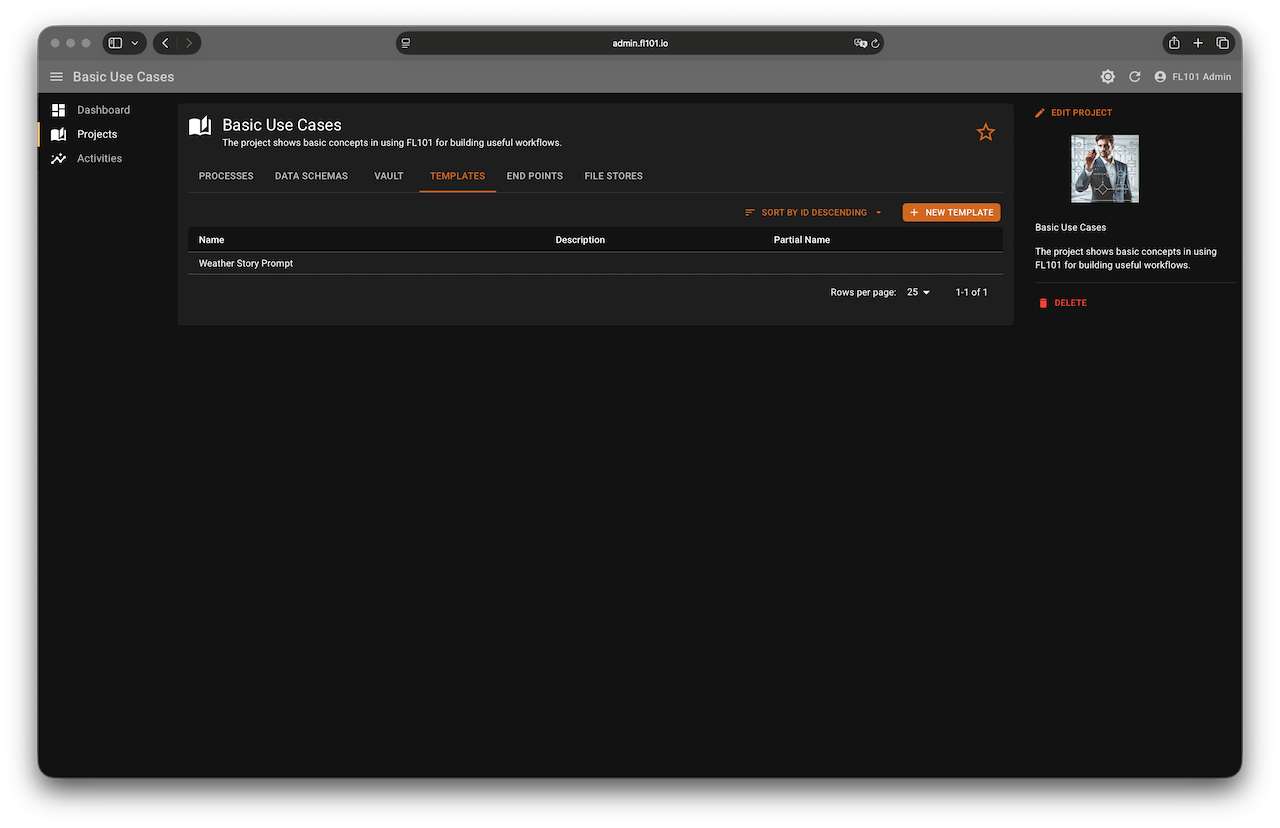
Step 1 – Project Setup & Secrets
Create two encrypted records in your project’s Vault (encrypted with AWS KMS):
WeatherAPI Key– your API key from weatherapi.comOpenAI Key– "Bearer " + your OpenAI API key
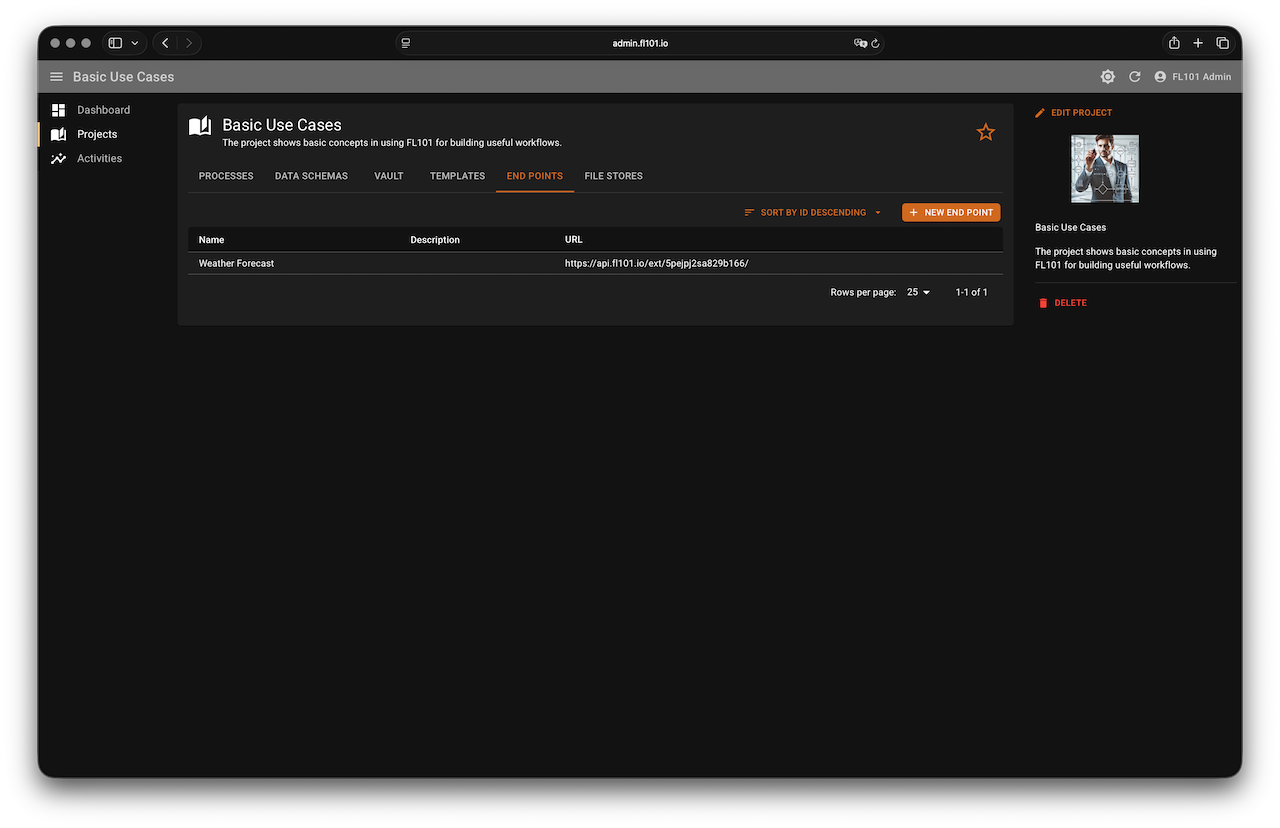
Also create an End Point named “Weather Forecast” (or any name you prefer). This endpoint will be used by the Message Start Event.

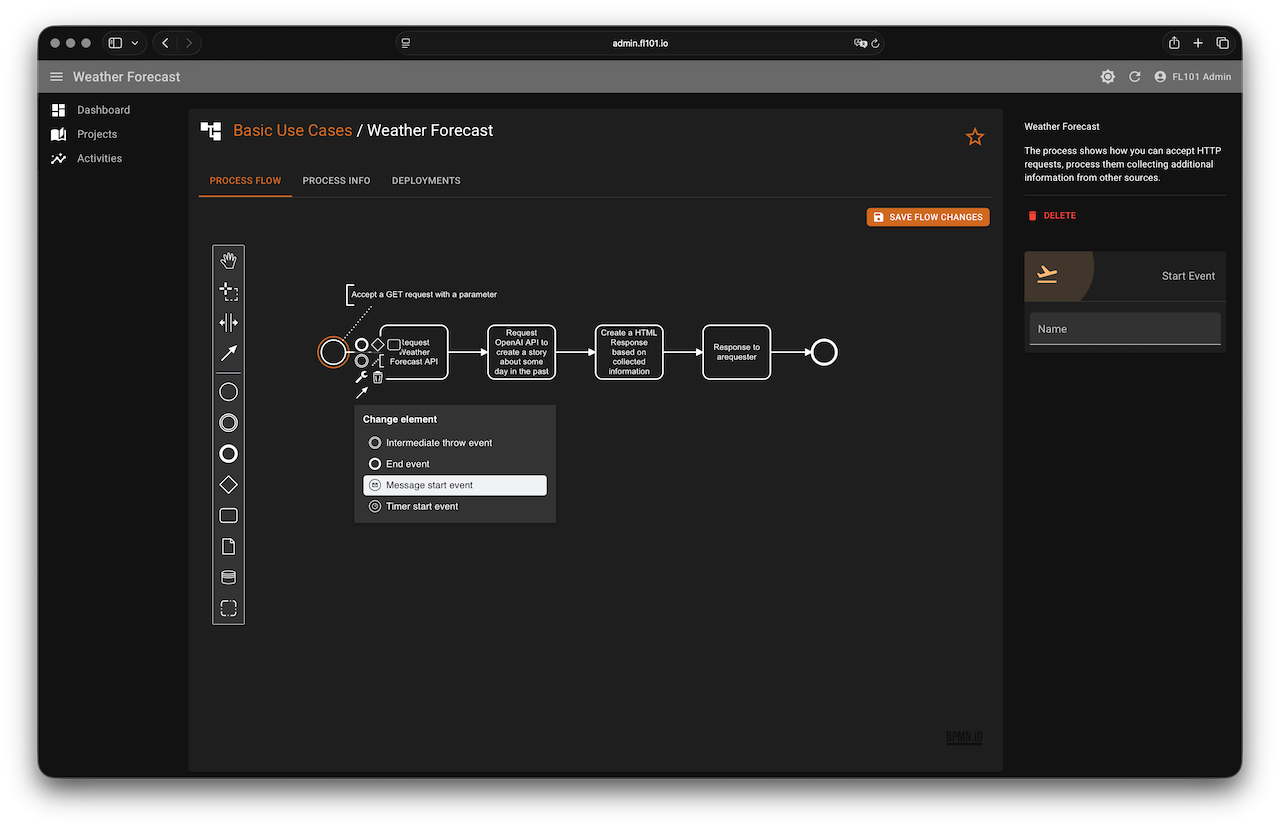
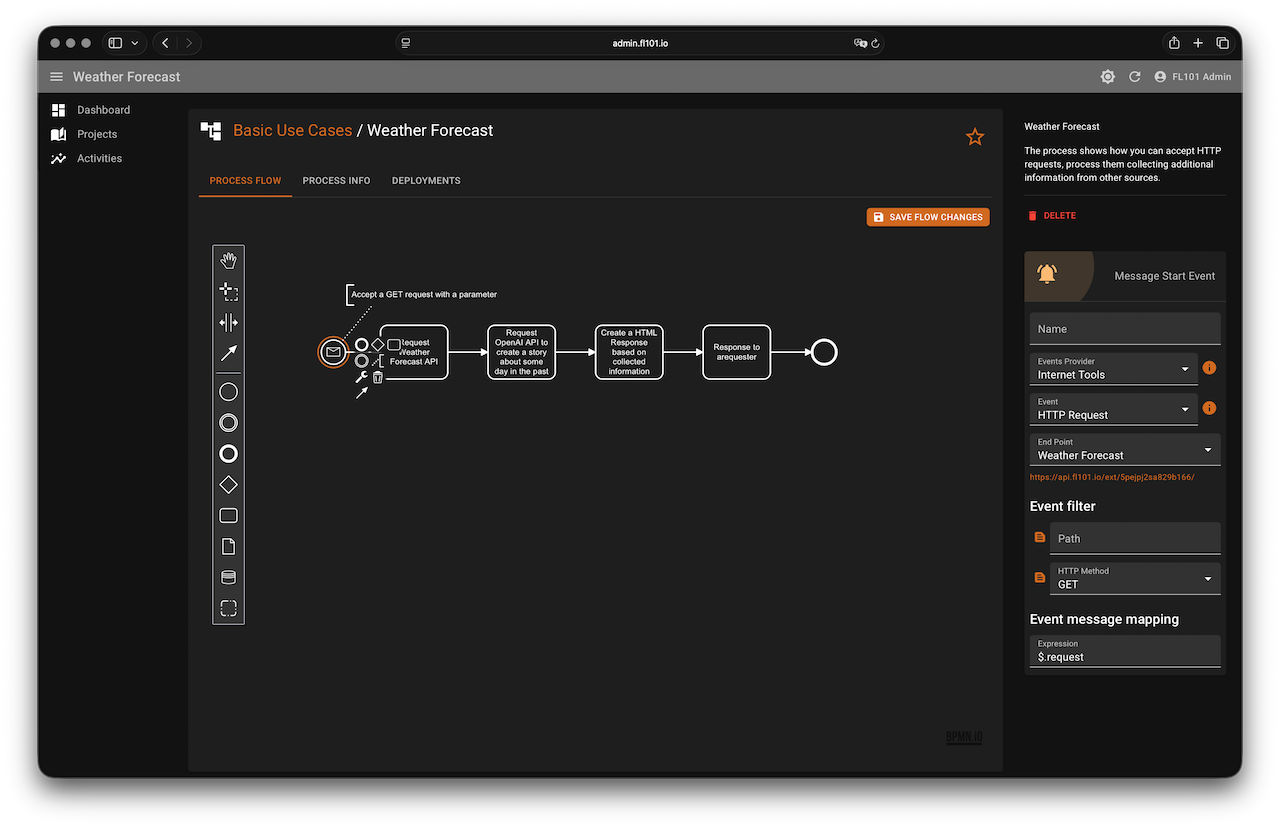
Step 2 – Message Start Event (HTTP Request)
Convert the Start Event to a Message Start Event:
- Events Provider: Internet Tools
- Event: HTTP Request
- End Point: Weather Forecast
- Method: GET
- Path: (leave empty)
- Result Mapping:
$.request
This makes the incoming query parameters (e.g., ?location=Melbourne) available at $.request.parameters.location.
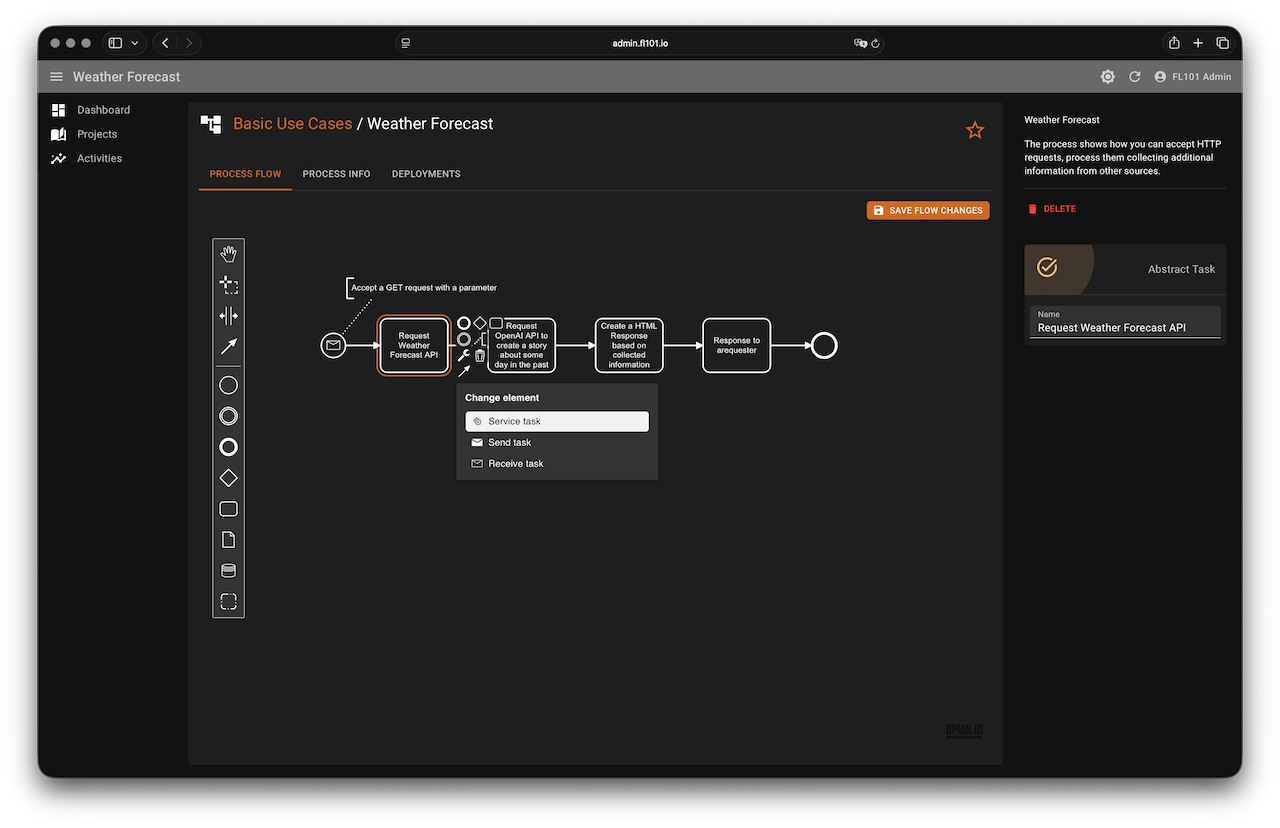
Step 3 – Call WeatherAPI.com
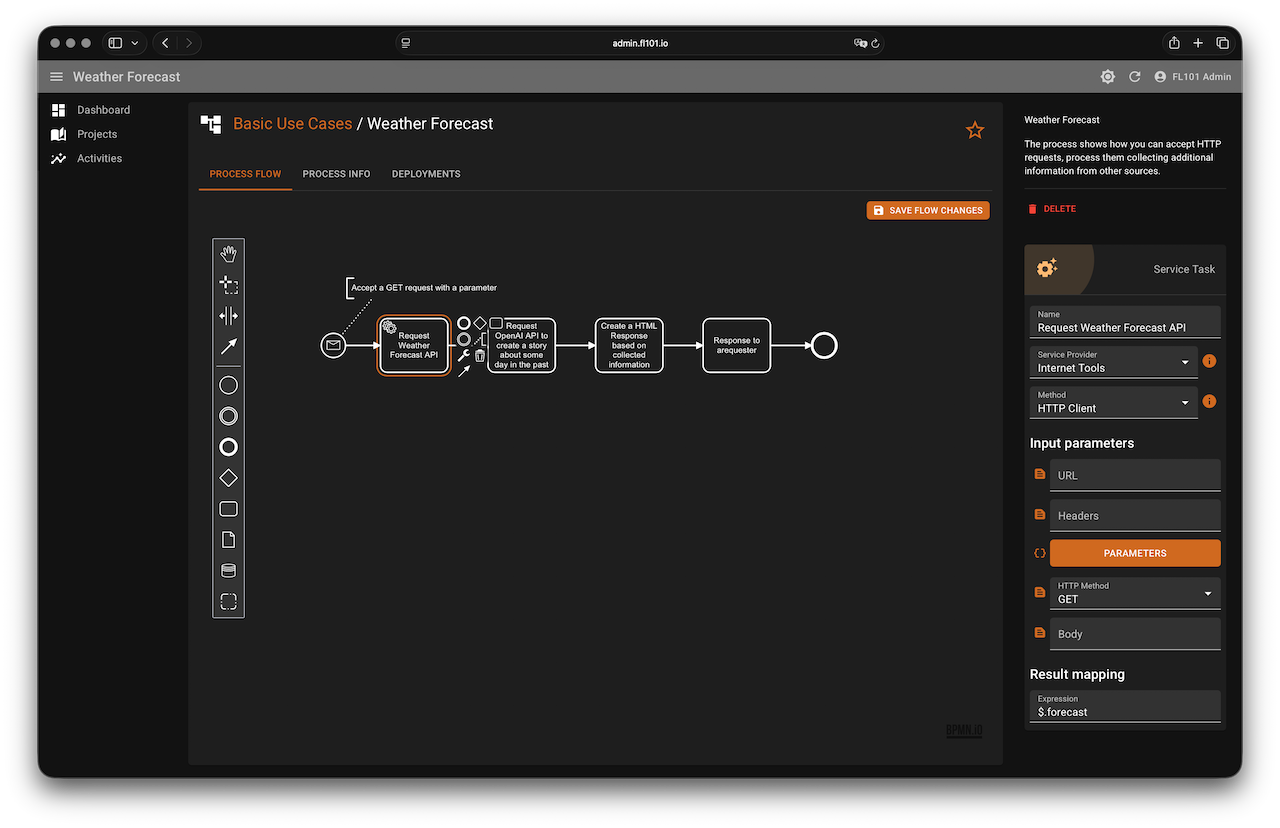
Convert the first Abstract Task to a Service Task → Internet Tools → HTTP Client with these settings:
- URL:
https://api.weatherapi.com/v1/forecast.json - Headers: (leave empty)
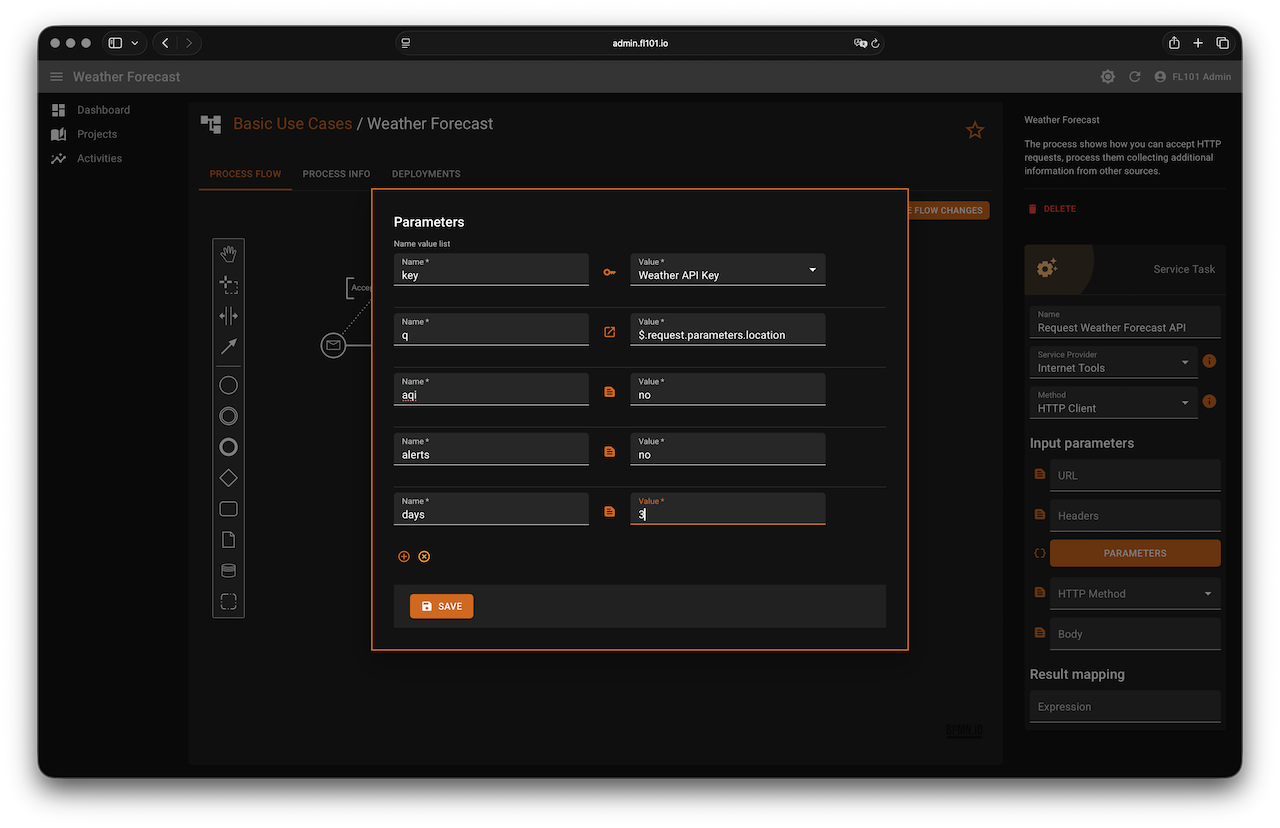
- Parameters (use Mapper):
key→ Vault →WeatherAPI Keyq→ Expression →$.request.parameters.locationaqi→noalerts→nodays→3
- Method: GET
- Body: (leave empty)
- Result Mapping:
$.forecast
Full response format is documented at weatherapi.com/docs.
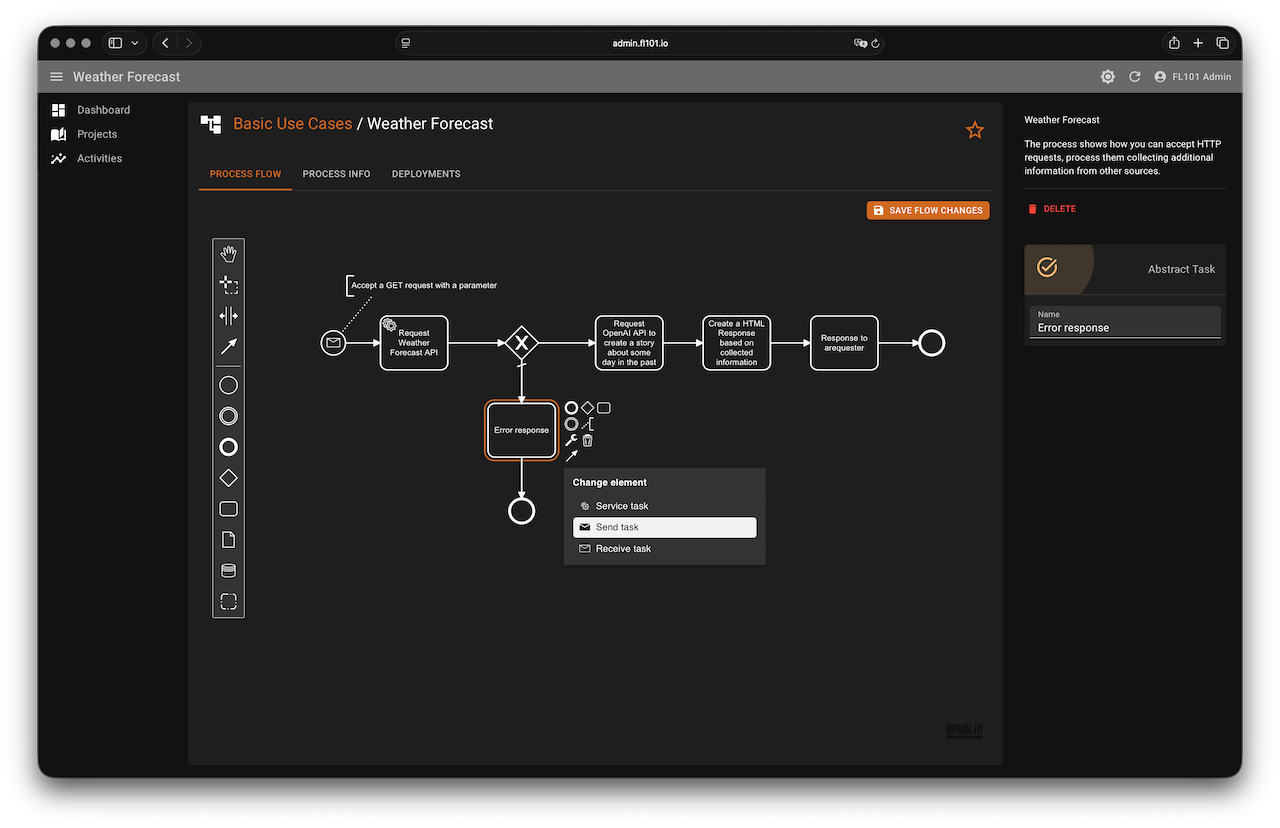
Step 4 – Check API Response (Error Handling)
Add an Exclusive Gateway right after the HTTP Client task.
- Happy path condition:
$[?(@.forecast.status == 200)] - Error path (mark as default): send a simple HTML error page (or 500 response) if the status is not 200.
This ensures users get a friendly message if the location is invalid or the external API fails.


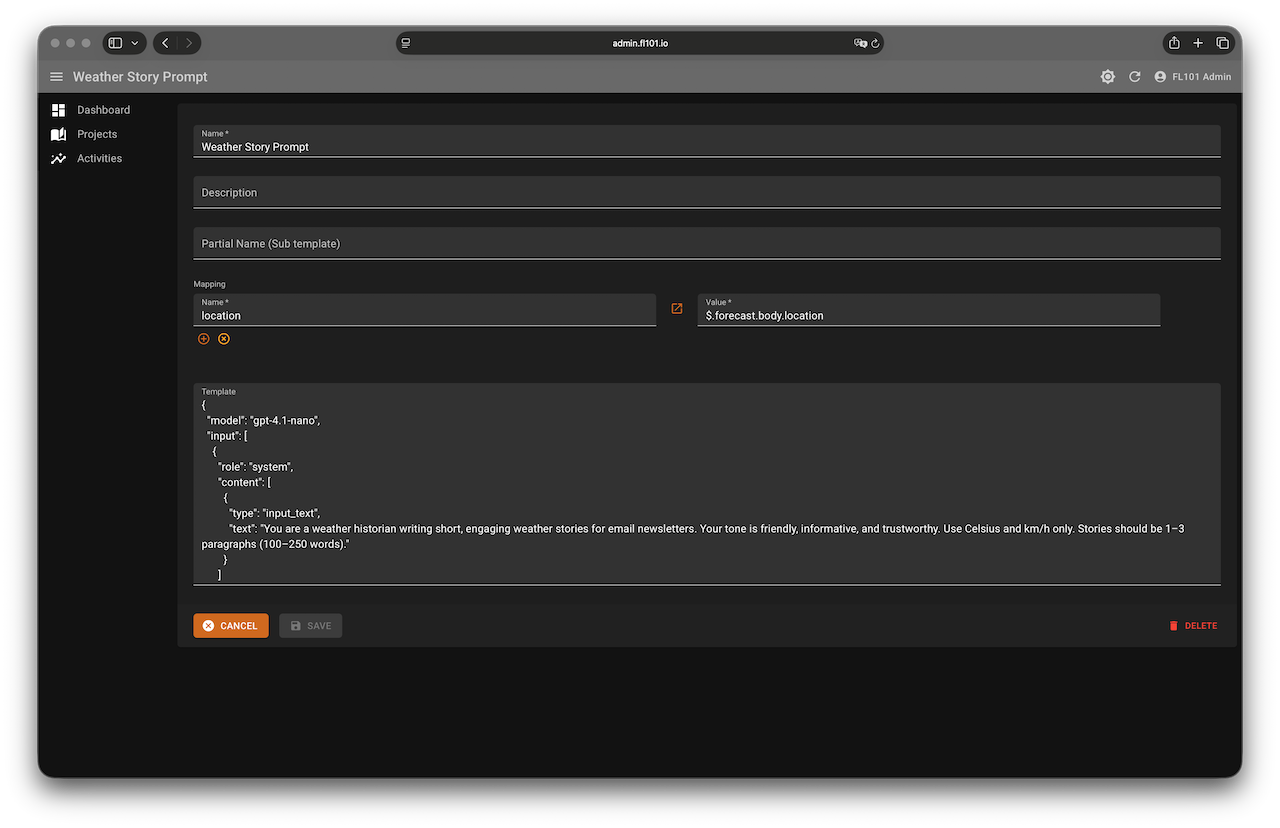
Step 5 – Generate Historical Weather Story with OpenAI
Create a Template named “Weather Story Prompt” with the following content (feel free to tweak the tone):
{
"model": "gpt-4.1-nano",
"input": [
{
"role": "system",
"content": [
{
"type": "input_text",
"text": "You are a weather historian writing short, engaging weather stories for email newsletters. Your tone is friendly, informative, and trustworthy. Use Celsius and km/h only. Stories should be 1–3 paragraphs (100–250 words)."
}
]
},
{
"role": "user",
"content": [
{
"type": "input_text",
"text": "Write a short weather history story for {{location.name}}, {{location.region}}, {{location.country}}. It should be connected to the same time of year — around same month and day as today {{location.localtime}} — but in a previous years. Focus on something notable like a storm, rare weather, or a record. Mention the year if possible and end with a light reflection, e.g. 'Just another way the skies keep us guessing.'"
}
]
}
],
"text": {
"format": {
"type": "text"
}
},
"reasoning": {},
"tools": [],
"temperature": 0.9,
"max_output_tokens": 500,
"top_p": 1,
"store": true
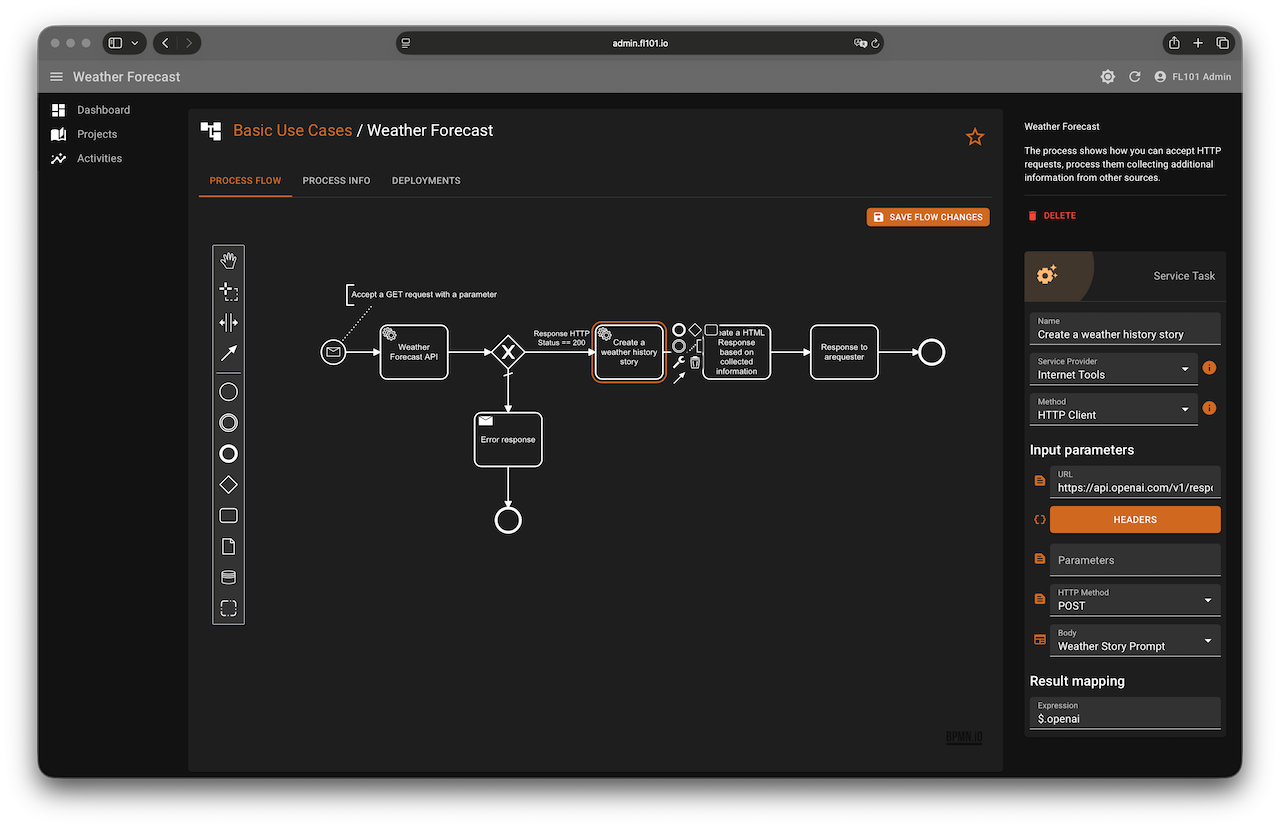
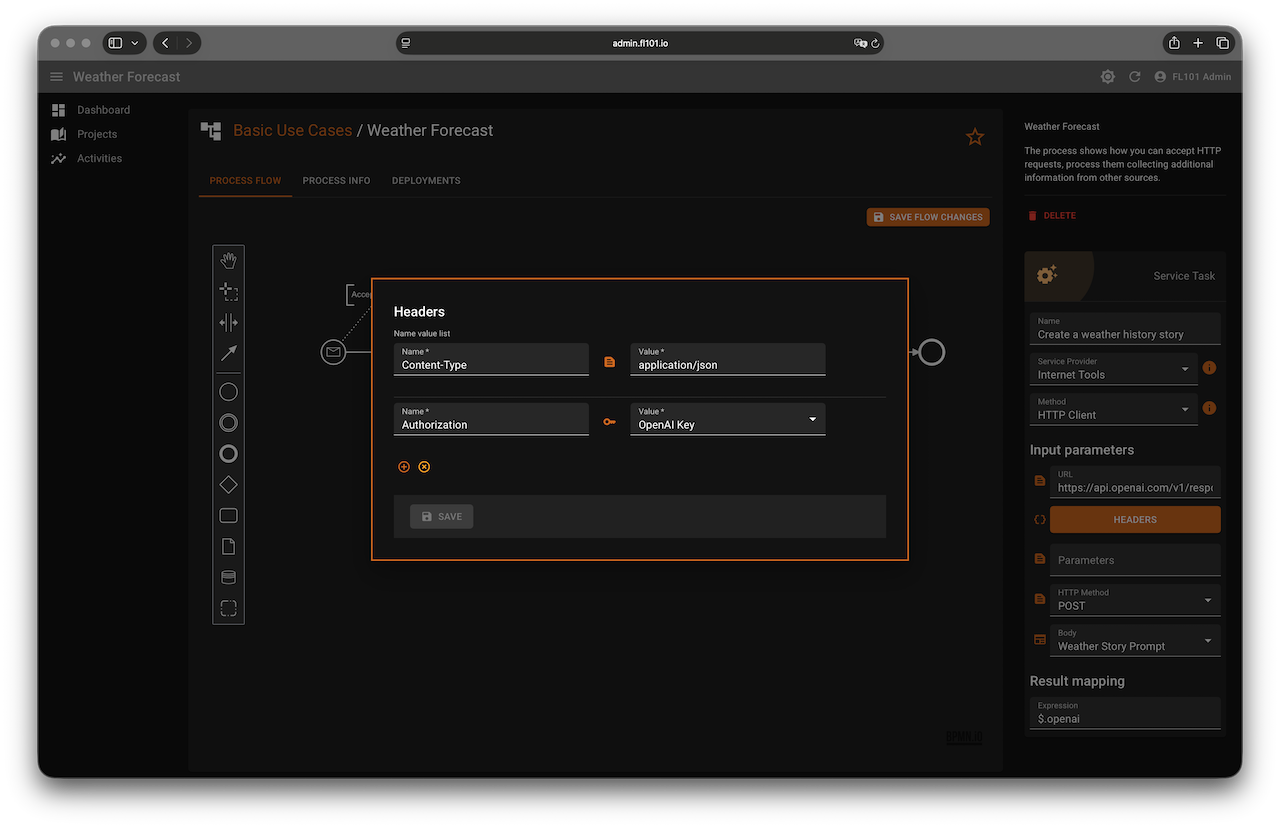
}Then convert the next Abstract Task to Service Task → HTTP Client:
- URL:
https://api.openai.com/v1/responses - Headers:
- Content-Type →
application/json - Authorization → Vault →
OpenAI Key
- Content-Type →
- Parameters: (leave empty)
- Method: POST
- Body: Template → “Weather Story Prompt”
- Result Mapping:
$.openai
The story text will be available at $.openai.body.output[0].content[0].text.
Step 6 – Build and Send the HTML Response
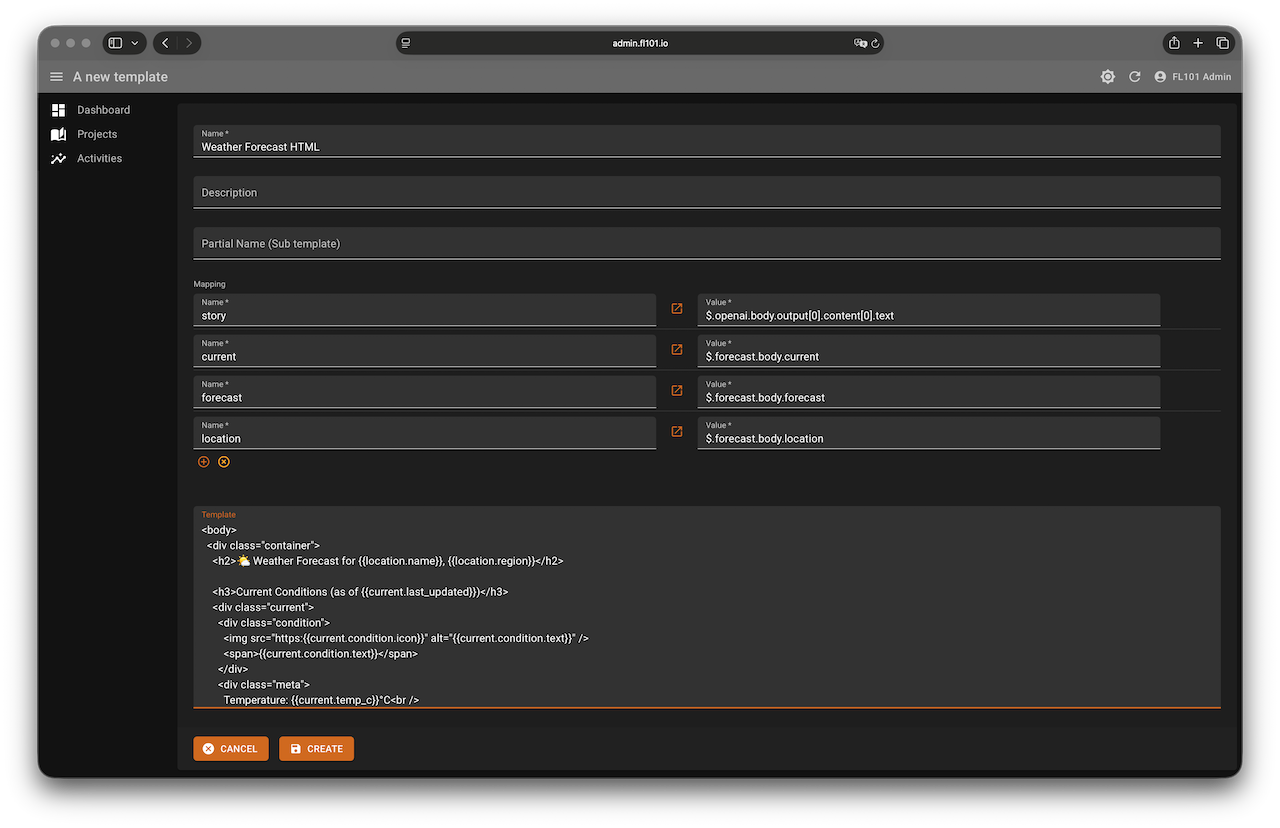
Create a second template named “Weather Forecast HTML” with these local variables:
story→$.openai.body.output[0].content[0].textcurrent→$.forecast.body.currentforecast→$.forecast.body.forecastlocation→$.forecast.body.location
Use this ready-to-use HTML template (Bootstrap-free, clean and mobile-friendly):
<!DOCTYPE html>
<html>
<head>
<meta charset="UTF-8" />
<style>
body { font-family: Arial, sans-serif; color: #333; }
.container { max-width: 600px; margin: auto; padding: 1em; background: #f9f9f9; border-radius: 8px; }
h2 { color: #2b7bb9; }
h3 { color: #444; margin-top: 1.5em; }
.current, .day, .history { background: #ffffff; border-radius: 6px; padding: 1em; margin-bottom: 1em; border: 1px solid #ddd; }
.condition { display: flex; align-items: center; }
.condition img { margin-right: 10px; }
.meta { font-size: 0.95em; color: #555; }
.footer { font-size: 0.9em; color: #888; margin-top: 2em; }
</style>
</head>
<body>
<div class="container">
<h2>🌤️ Weather Forecast for {{location.name}}, {{location.region}}</h2>
<h3>Current Conditions (as of {{current.last_updated}})</h3>
<div class="current">
<div class="condition">
<img src="https:{{current.condition.icon}}" alt="{{current.condition.text}}" />
<span>{{current.condition.text}}</span>
</div>
<div class="meta">
Temperature: {{current.temp_c}}°C<br />
Feels Like: {{current.feelslike_c}}°C<br />
Wind: {{current.wind_kph}} km/h {{current.wind_dir}}<br />
UV Index: {{current.uv}}<br />
Humidity: {{current.humidity}}%
</div>
</div>
<h3>3-Day Forecast</h3>
{{#forecast.forecastday}}
<div class="day">
<div class="date">{{date}}</div>
<div class="condition">
<img src="https:{{day.condition.icon}}" alt="{{day.condition.text}}" />
<span>{{day.condition.text}}</span>
</div>
<div class="meta">
Max: {{day.maxtemp_c}}°C | Min: {{day.mintemp_c}}°C<br />
Wind: {{day.maxwind_kph}} km/h<br />
Chance of Rain: {{day.daily_chance_of_rain}}%<br />
UV Index: {{day.uv}}<br />
Humidity: {{day.avghumidity}}%
</div>
</div>
{{/forecast.forecastday}}
{{#story}}
<h3>Did You Know?</h3>
<div class="history">
<p>{{story}}</p>
</div>
{{/story}}
<p class="footer">Sent on {{location.localtime}} | Powered by <a href="https://www.weatherapi.com/" title="Weather API">WeatherAPI.com</a></p>
</div>
</body>
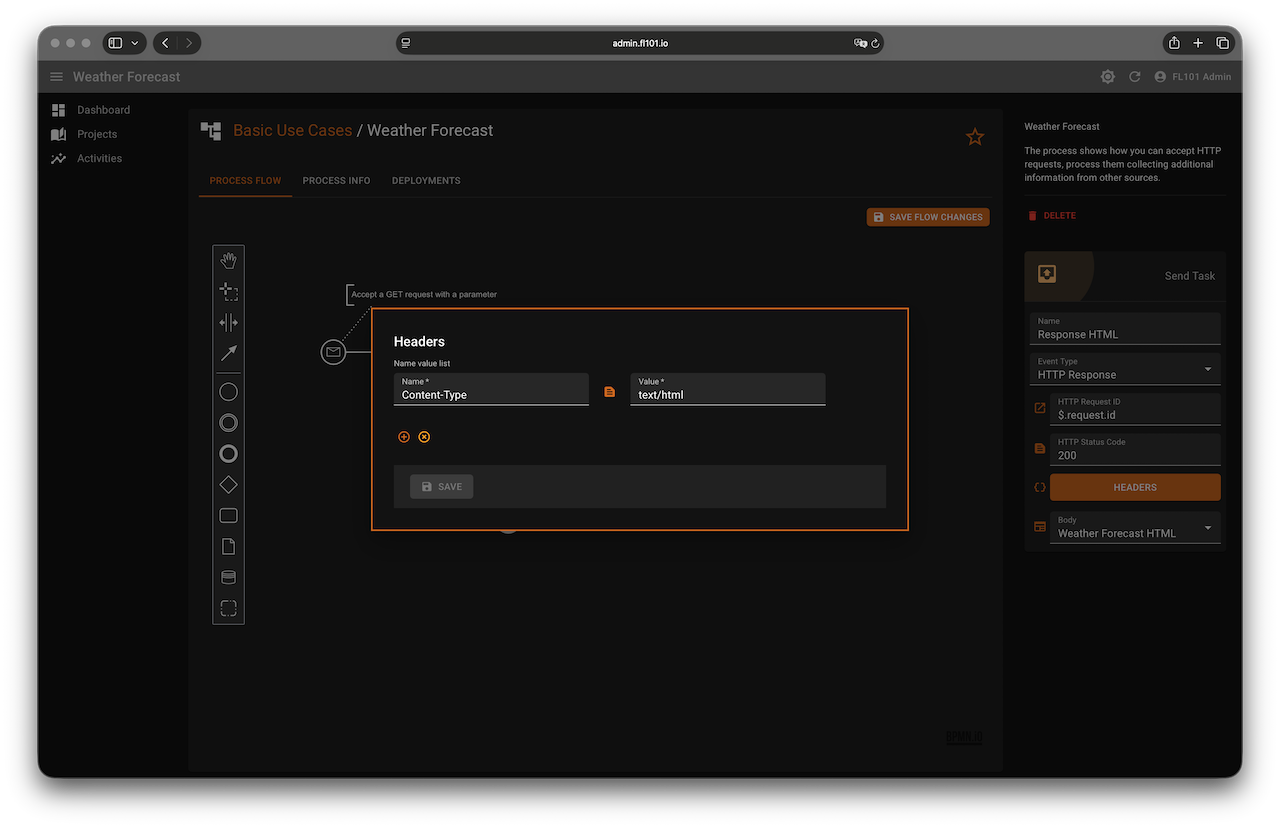
</html>Finally, convert the last task to a Send Task:
- HTTP Request ID:
$.request.id - Status Code: 200
- Headers: Content-Type →
text/html - Body: Template → “Weather Forecast HTML”
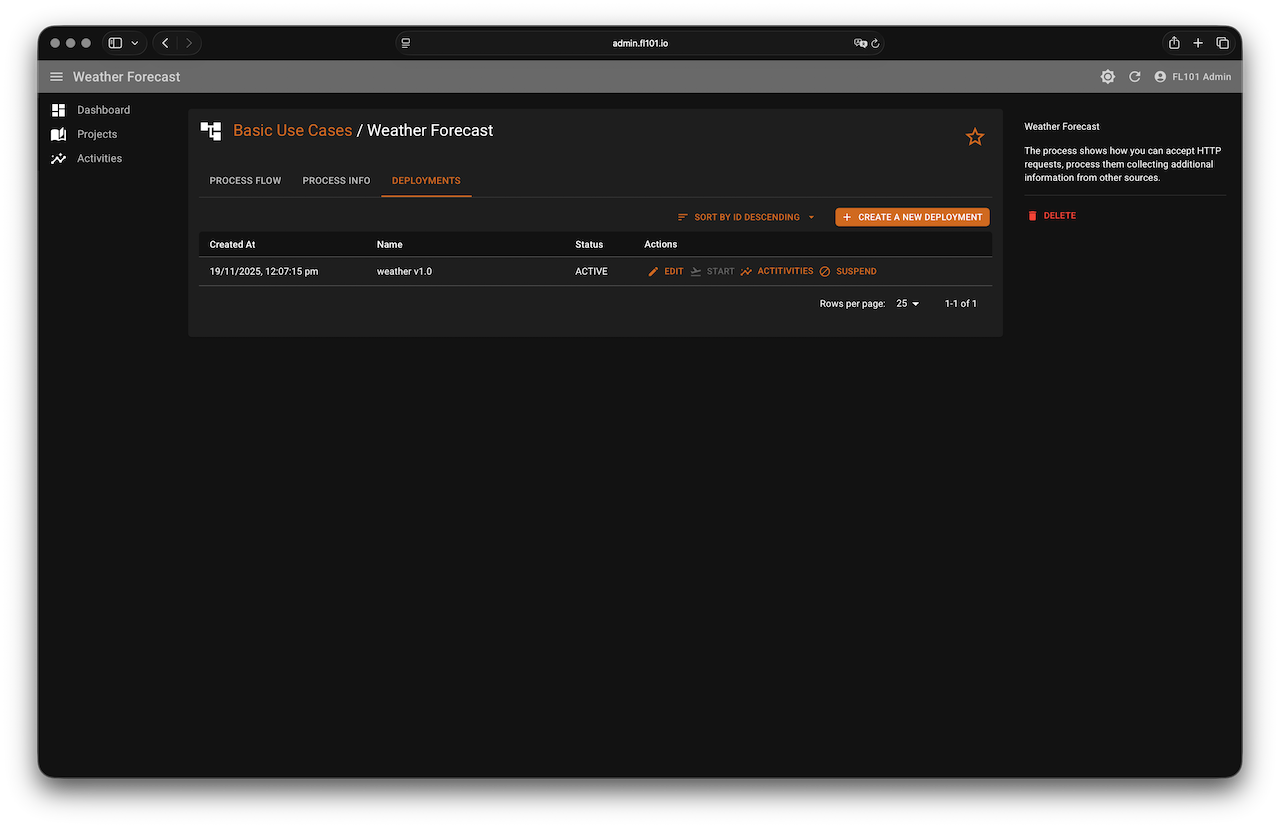
Step 7 – Deploy & Test
1. Go to your Endpoint settings and set a friendly Alias, e.g., weather.
2. Create a new Deployment.
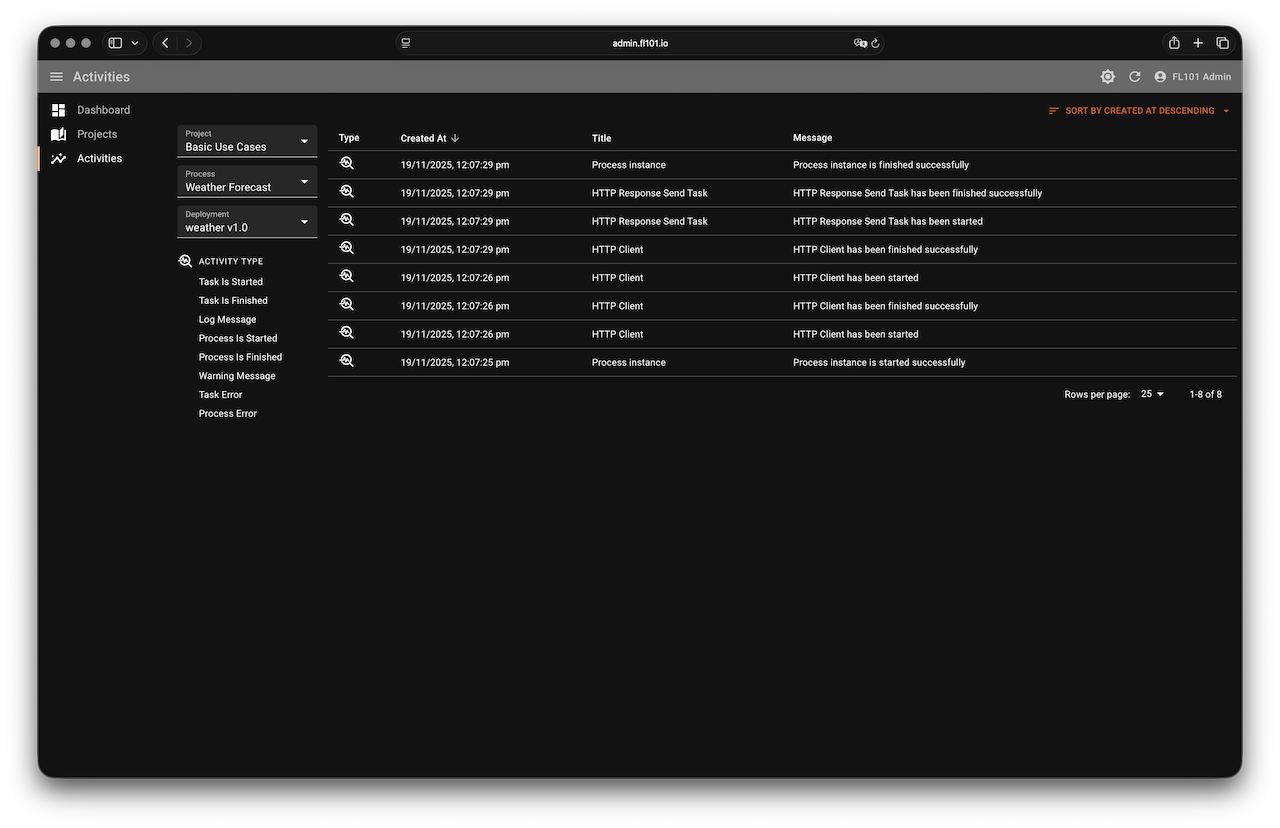
3. Once deployed, try it out:
You should receive a nicely styled HTML page with current weather, forecast, and an AI-generated historical story — all in a few seconds!
Tip: Everyone who registers on FL101 automatically joins the “FL101 Use Cases Team”. There you can review the complete process source, see live deployments, and use it as a starting point for your own ideas. Enjoy building! 🚀