Feedback Form

This use case demonstrates how to embed a simple feedback form directly on your website using FL101 End Points. By enabling CORS, you can securely trigger FL101 processes from your site. We'll cover:
- Displaying a feedback form via HTMX
- Receiving and validating submitted data
- Enriching data with client IP and timestamp
- Storing submissions in a storage
- Limiting submissions per IP address (5 per day)
- Automatically deleting old records
Step 1 – Prepare the Required Components
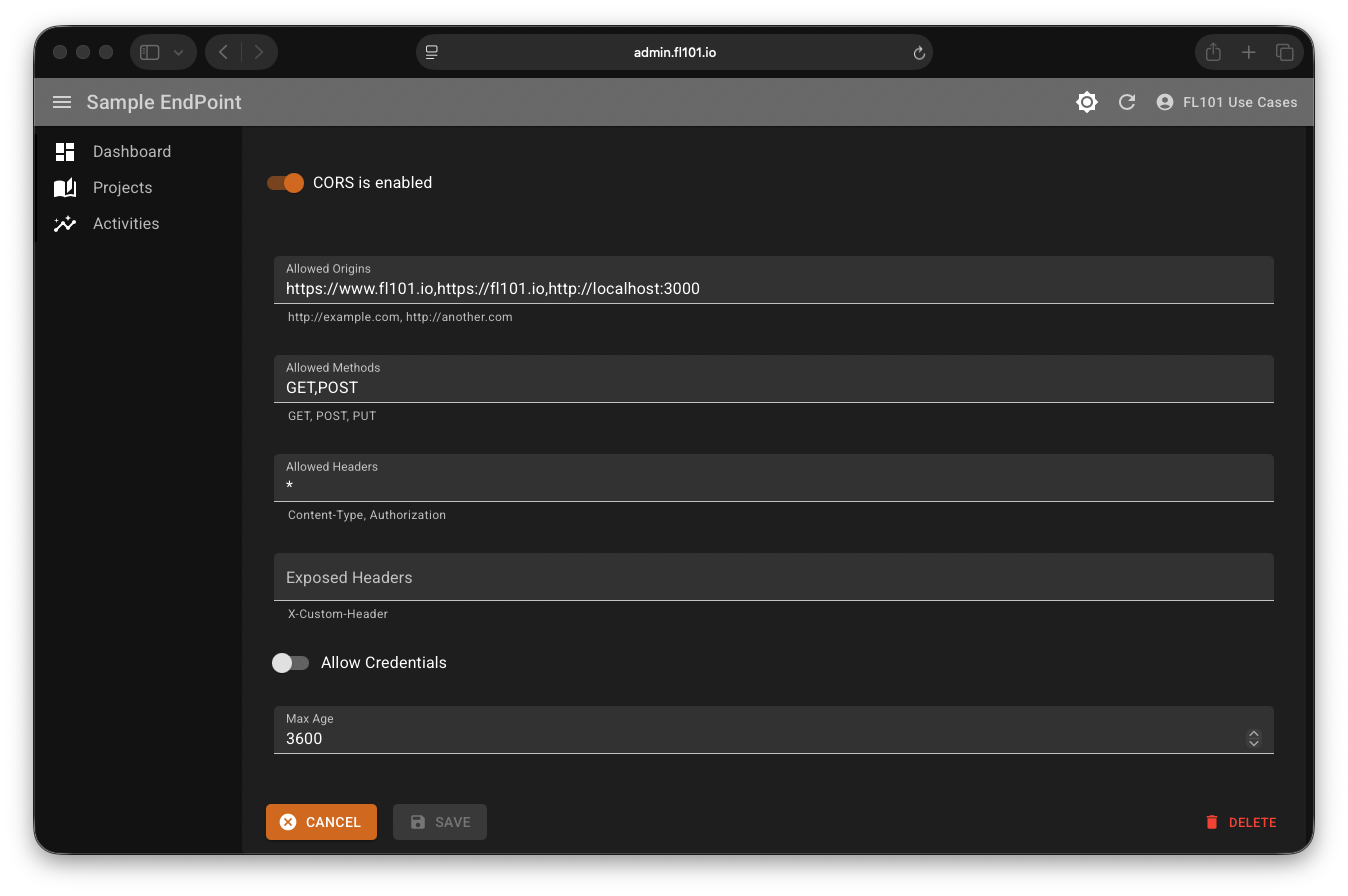
First, create an End Point named “Sample EndPoint” (or any name you like). Configure it as follows:
- Alias:
sample - Response Timeout: 10 seconds
- Request Rate Limit: 1 request per second
- CORS Settings:
- Allowed Origins:
https://www.fl101.io,https://fl101.io - Allowed Methods: GET, POST
- Allowed Headers: *
- Max Age: 3600
Enable CORS to allow your website to call the endpoint directly.

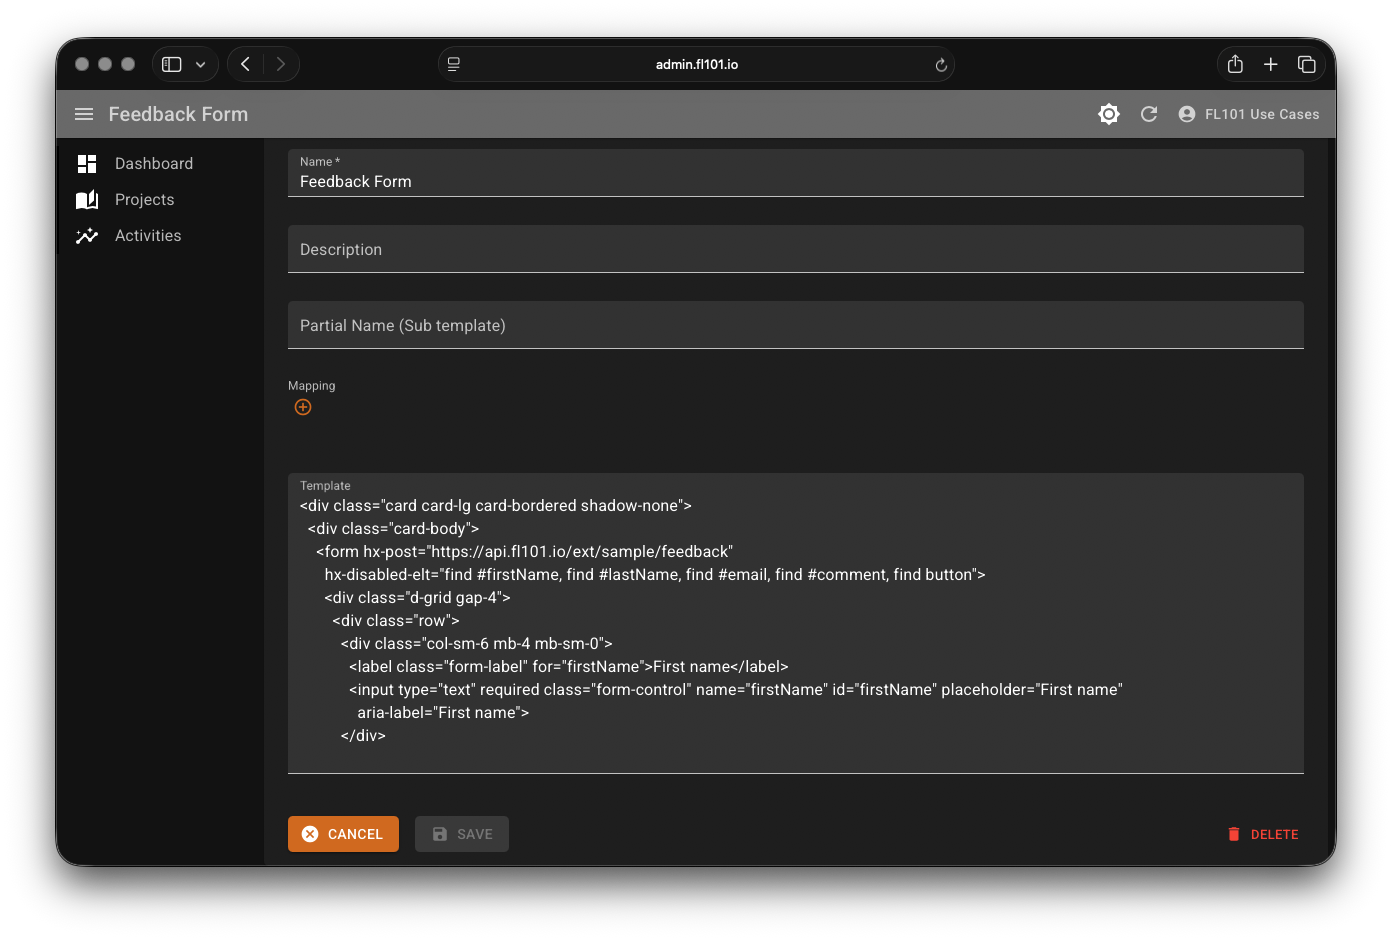
Next, create a Template named “Feedback Form” containing the static HTML for the form (this will be returned on GET requests).
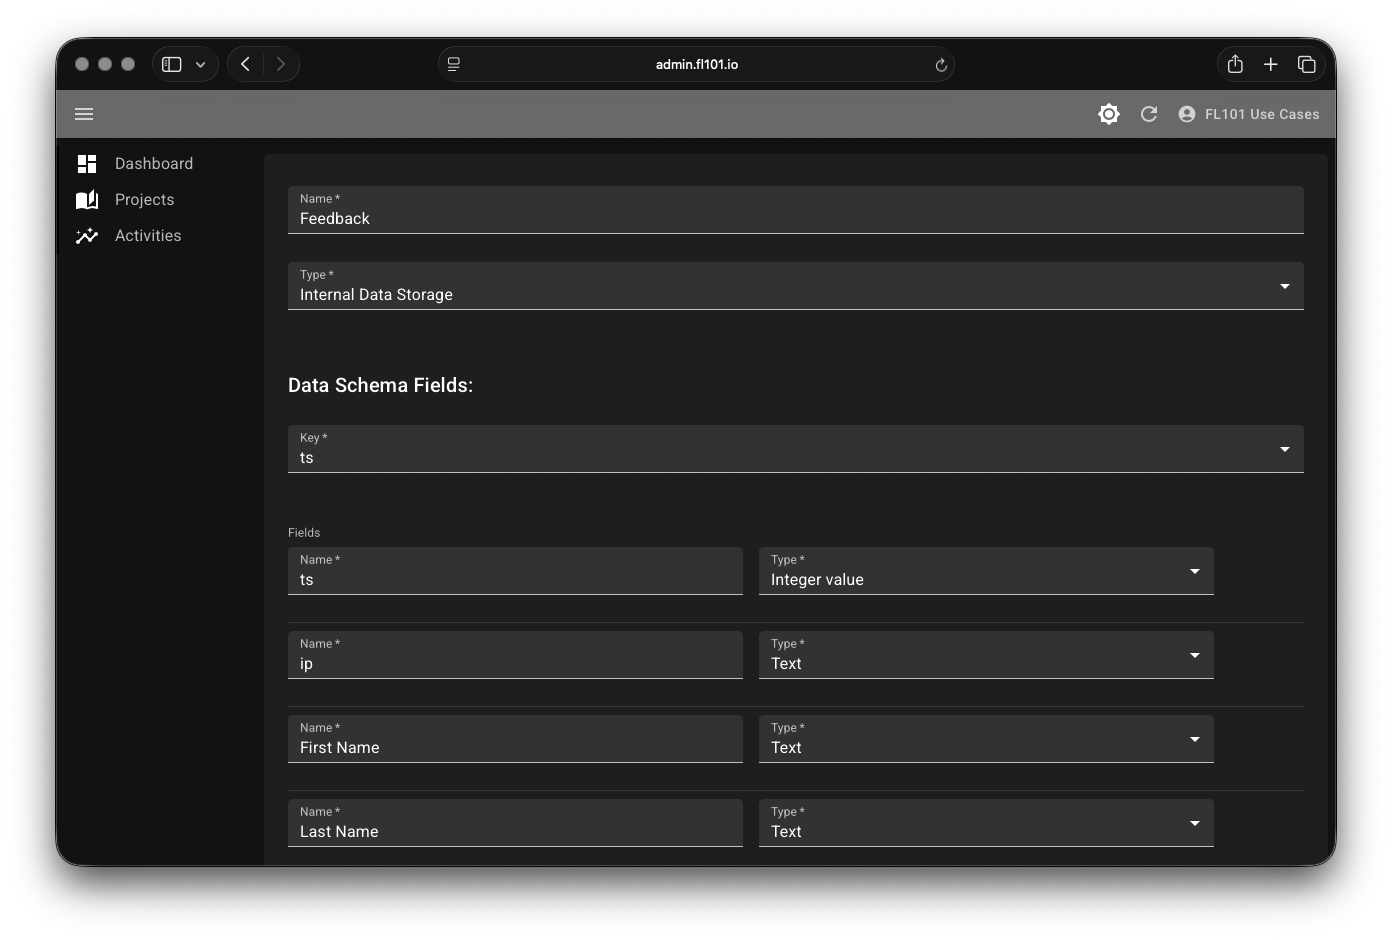
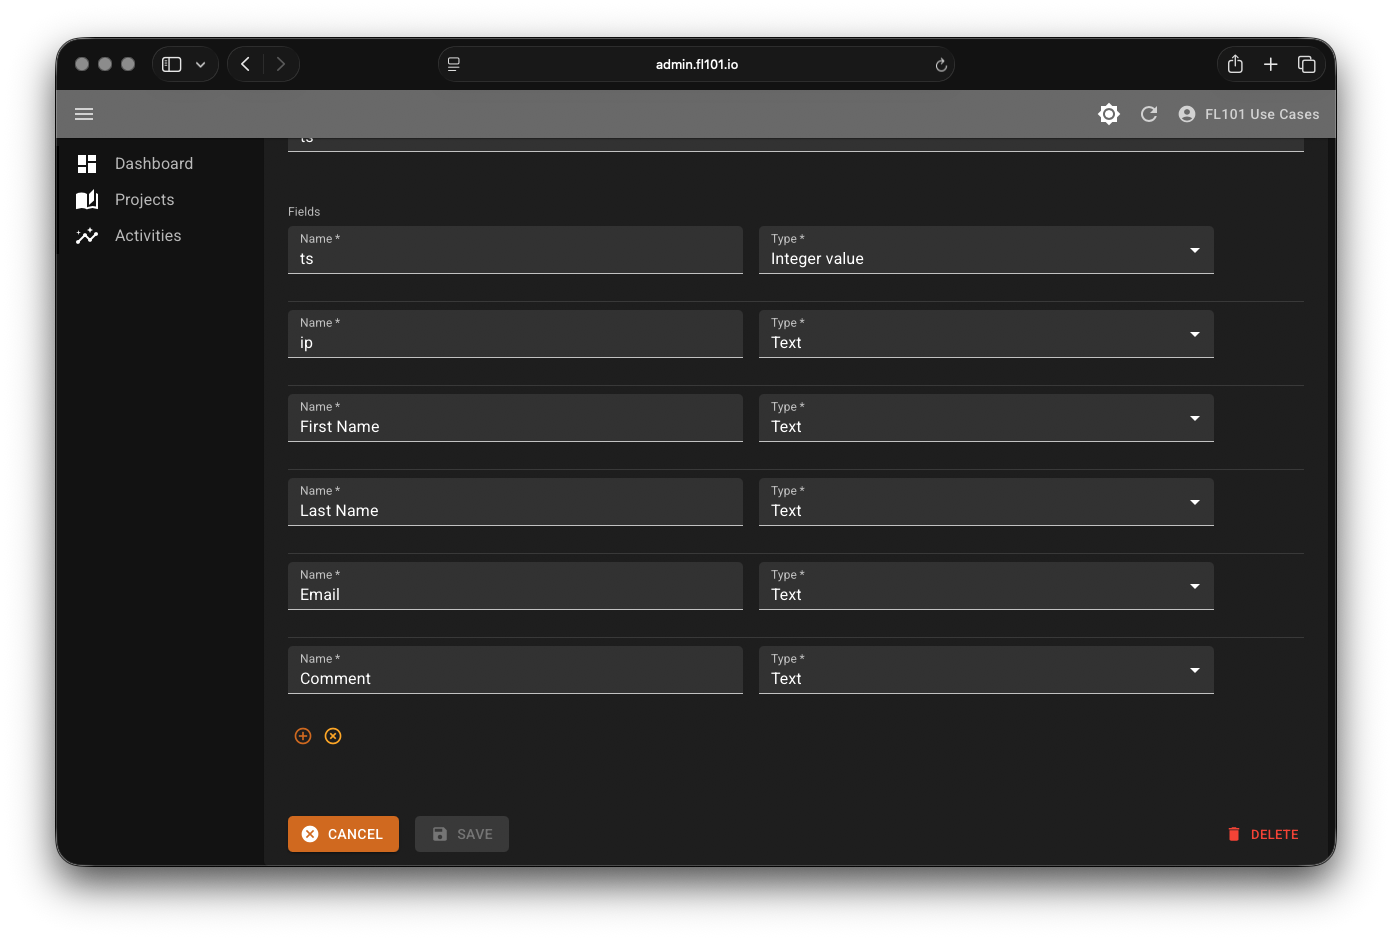
Create a Data Schema named “Feedback” to store submissions with the following fields:
ts(Integer) – Timestampip(Text) – Client IP addressFirst Name(Text)Last Name(Text)Email(Text)Comment(Text)
On your website, add the HTMX library to enable dynamic loading without full page reloads. Include these lines in the <head> section:
<meta name="htmx-config" content='{"selfRequestsOnly":false}'>
<script src="https://cdn.jsdelivr.net/npm/htmx.org@2.0.8/dist/htmx.min.js" integrity="sha384-/TgkGk7p307TH7EXJDuUlgG3Ce1UVolAOFopFekQkkXihi5u/6OCvVKyz1W+idaz" crossorigin="anonymous"></script>
Then, add this HTML where you want the feedback form to appear:
<div class="mb-4" hx-get="https://api.fl101.io/ext/sample/feedback" hx-trigger="load">
    <div class="spinner-border text-primary" role="status">
        <span class="visually-hidden">Loading...</span>
    </div>
</div>
This will automatically load the form when the page loads.
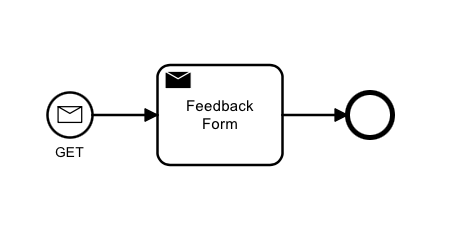
Step 2 – Display the Feedback Form (GET Request)
Create a simple process that starts on a GET request to the path feedback. It should return the “Feedback Form” template with:
- HTTP Status: 200
- Content-Type:
text/html; charset=UTF-8
Step 3 – Handle Form Submission (POST Request)
Create two additional templates for responses:
- Success Message:
<h2 class="h4">Thank you! Your comment has been submitted successfully. We value your input!</h2><p class="alert alert-warning">We're sorry, but we've reached the daily limit of 5 submissions from this IP address. We appreciate your interest and invite you to submit again tomorrow.</p>Extend the process with a POST start event on the same path. The flow:
- Load existing records from the “Feedback” schema where
ipmatches the client IP andtsis within the last 24 hours. - Check if the count is less than 5 using a condition:
$[?(@.today_records.length() < 5)] - If yes → Return the Success Message template and store new record (with timestamp, IP, and form fields).
- If no → Return the Warning Message template.

Step 4 – Automatically Clean Up Old Records
To keep the storage tidy, extend the process with a timer start event that runs hourly:
- Calculate a timestamp for “3 days ago”.
- Load all records where
tsis older than that timestamp, using the option Remove records after loading (this deletes them automatically).

Step 5 – See It in Action
Here's a live demo of the feedback form:
To explore the full configuration and replicate this use case in your own project, sign up for a free FL101 account — all new users get access to the “Basic Use Cases” project where this example is shared.